Last Updated: April 2026 | By the HomeschoolPicks Team (15+ years combined homeschooling experience across three families, currently raising seven children ages 4-17 in our Charlotte Mason homeschools)
Affiliate Disclosure: This article contains affiliate links. If you purchase through our links, we may earn a small commission at no extra cost to you. We only recommend resources we’ve personally used with our own children.
The first time I took my kids on a “nature study” walk, I had no idea what I was doing. I figured we’d wander around the backyard, spot a bird or two, and call it school. Instead, my five-year-old spent 40 minutes watching a single ant carry a crumb across the patio, and my eight-year-old filled three pages of his notebook with drawings of moss. That was the moment I understood why Charlotte Mason put nature study at the center of her method. It isn’t just fresh air. It’s a real curriculum, and it works.
If you’re new to Charlotte Mason nature study and feel a little intimidated, you’re not alone. However, the good news is that getting started is simpler than you think, requires almost no money, and will become one of your family’s favorite homeschool traditions. In this guide, we’ll walk through exactly what nature study is, why it works, what you need, and how to run your first outing this week.
Quick Answer: What Is Charlotte Mason Nature Study?
TL;DR: Charlotte Mason nature study is the regular, unhurried practice of taking children outdoors to observe the natural world, then recording what they see in a nature notebook. In Mason’s original schools, students spent several hours a week outside, learned to identify birds and plants, sketched specimens, and wrote short notes. It’s science, art, writing, and reverence rolled into one.
Why Charlotte Mason Loved Nature Study
Mason believed that children should know their world firsthand before they ever opened a biology textbook. Therefore, instead of memorizing classifications, her students watched beetles in the grass. Instead of reading about seasons, they tracked their own local oak tree from bud to fall. In Mason’s words, “Never be within doors when you can rightly be without.” That wasn’t poetic fluff. It was educational policy.
Moreover, she understood something modern research has confirmed: children learn deeply when they observe, not when they’re lectured. A child who spends twenty minutes watching a spider spin a web will remember that experience for life. A child who reads one paragraph about spiders will forget it by next week. Mason built her whole science approach around this insight.
Overview: The Four Parts of Nature Study
A well-run Charlotte Mason nature study session has four simple parts:
- Go outside. Not just the yard fence, ideally somewhere with wild growth.
- Observe carefully. Then pick one thing and really look at it for several minutes.
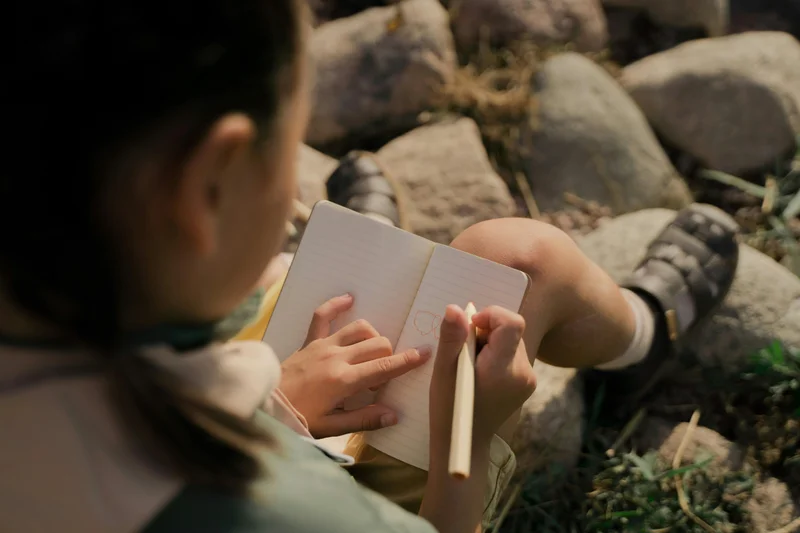
- Record it. Afterward, draw, label, and write a few sentences in a notebook.
- Look it up later. Finally, use a field guide or good living book to learn more.
That’s it. No lesson plan. No worksheets. No grades. Just outside time, observation, drawing, and light research afterward.
Materials You’ll Need
Here’s the full supply list after six years of running nature study with our own students:
- A blank or lightly lined notebook per child. For instance, a simple composition book works fine.
- A set of colored pencils. Specifically, Prismacolor if you want nice ones, or any brand for beginners.
- A basic field guide for your region. Ideally, one for birds and one for trees or wildflowers.
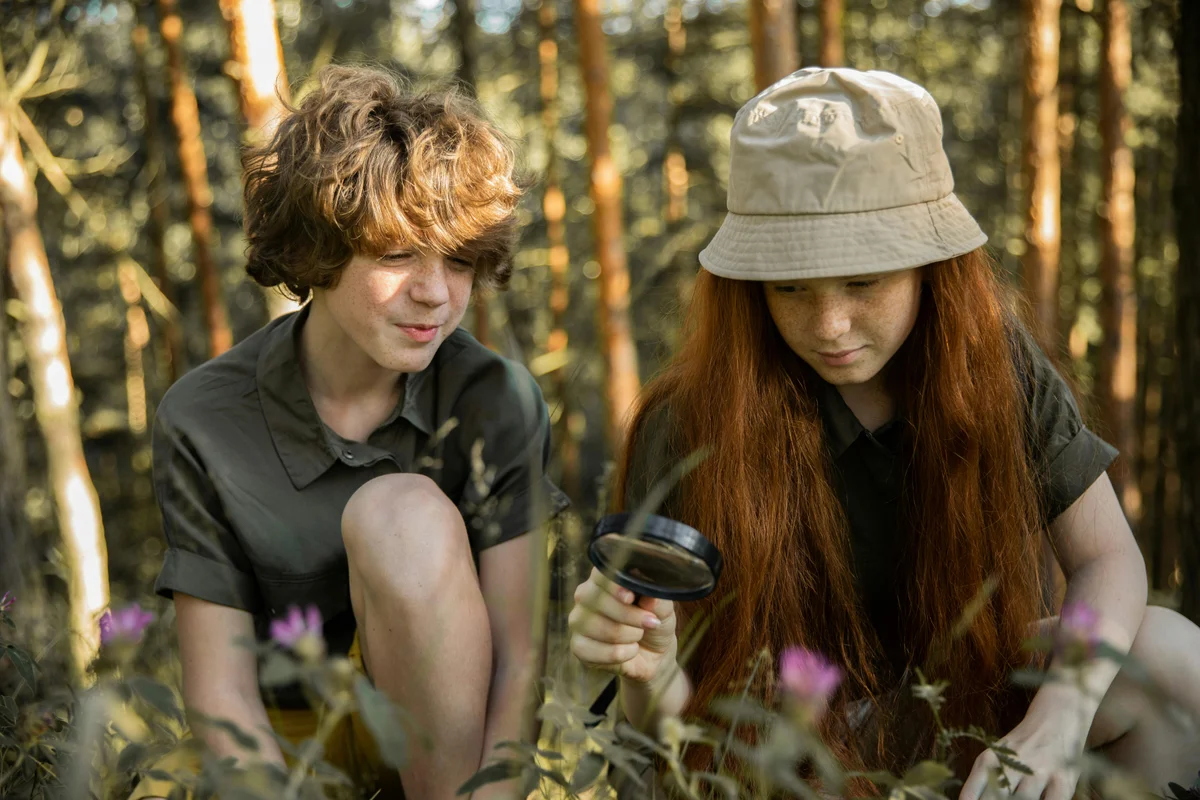
- A magnifying glass. Despite being cheap, it’s magical for kids.
- A small canvas bag. You’ll use it for collecting leaves, seeds, and feathers.
- Weather-appropriate clothes and sturdy shoes. Naturally, comfort beats style here.
Total cost for our family to get started: about $40. For instance, we bought the notebooks at the dollar store, the colored pencils on sale, and one Peterson field guide used. That’s genuinely all you need.
Benefits of Charlotte Mason Nature Study
- Builds real science knowledge. Specifically, kids learn genuine botany, entomology, and ornithology firsthand.
- Develops observation skills. As a result, they notice more in every area of life.
- Improves mental health. Additionally, time outdoors lowers stress and supports focus.
- Strengthens drawing and writing. Meanwhile, notebooks provide gentle art and composition practice.
- Creates shared family memories. Indeed, you’ll look back on these hikes for decades.
- Costs almost nothing. After all, outside is free.
According to the U.S. Centers for Disease Control, children who get at least 60 minutes of outdoor active play daily show measurable improvements in attention, sleep, and academic performance. In addition, the North American Association for Environmental Education has documented that regular outdoor learning improves critical thinking and science scores across grade levels. In our own homeschool, my kids can name more local birds and trees than I can, and I’ve been watching them all my life.
Challenges and Common Obstacles
- Weather. Naturally, you’ll be tempted to skip rainy and cold days. However, bundle up and go anyway.
- Parent discomfort. If you don’t know a finch from a sparrow, you’ll feel unqualified. Fortunately, you’ll learn alongside your child.
- Urban settings. Surprisingly, you can do great nature study in a city park, a backyard, or even on a balcony with potted plants.
- Reluctant kids. Some children resist being “made to draw.” Instead, let them collect specimens and narrate.
- Bugs. Yes, you’ll encounter them. In fact, that’s the point.
Best Practices for Running Nature Study
Go Weekly, Same Day, Same Time
Consistency beats ambition. Therefore, a weekly 90-minute outing you actually do is worth more than a daily plan you abandon by October. We do Thursday mornings, rain or shine, and after six years it’s become sacred family time.
Focus on One Thing Per Outing
Don’t try to “cover” everything. Instead, pick a single focus: the creek, the bird feeder, a specific tree, a patch of moss. Spend 20 minutes there. Observe, sketch, and discuss.
Use Real Field Guides, Not Apps
Apps are quick, but paper field guides teach children to look carefully and compare features. For beginners, we recommend Peterson First Guides for kids and the full Peterson or Sibley guides for parents. You can also browse the free resources from the National Audubon Society when you need to confirm an ID at home.
Teach Notebook Keeping, Gently
In general, expect ugly drawings at first. That’s fine. The goal is attention, not art. Write the date, location, and a one-sentence observation at the top. Over time, both skill and care will grow.
Pair With a Living Book
After your outing, read from a good nature living book. Thornton Burgess’s Burgess Bird Book for Children and Anna Botsford Comstock’s Handbook of Nature Study are classics. Similarly, John Muir Laws’s Laws Guide to Nature Drawing and Journaling is excellent for older kids.
Scope: Nature Study Across the Ages
- Ages 2-5: Basically free outdoor play, collecting things, and naming what you see together. No notebook required.
- Ages 6-8: Now introduce a notebook. Typically short 20-30 minute outings with one drawing and one sentence per visit.
- Ages 9-12: Longer outings (45-60 minutes). In addition, label drawings, research later, and start learning identification.
- Ages 13-16: More rigorous work. Specifically, written observations, seasonal phenology charts, and ecology projects.
- Ages 17+: Finally, independent field work, nature writing, and deeper biology connections.
Lessons and Activities Beyond Observation
This practice isn’t only sitting and watching. In practice, some of our favorite student activities have included: pressing leaves in phone books, making bark rubbings with crayon and paper, starting a bird list for the yard, tracking moon phases for a month, mapping the creek at different seasons, and photographing the same tree every week for a year. Each of these lessons takes almost no materials and generates lots of discussion later.
Features of a Great Nature Notebook Entry
A good nature notebook entry has a few features: the date, the location, a simple colored drawing (even rough is fine), a one or two sentence observation, and the common name of what was seen. Additionally, older students might add Latin names, weather, and cross-references to other entries. Keep it low-pressure. The notebook is a record, not a masterpiece.
Evaluation: How to Tell It’s Working
After a term of nature study, you should see specific changes. First, your children will start pointing things out to you, “Look, a hawk!”, on walks and drives. Second, they’ll ask science questions you can’t answer. Third, they’ll begin identifying plants and birds without being told. Finally, they’ll reach for the notebook voluntarily. If those four things are happening, you’re doing it right.
Comparison: Nature Study vs Science Textbook
| Approach | What It Teaches | Cost | Retention |
|---|---|---|---|
| Nature Study | Real observation, local ecology | $40 start | High, lifelong |
| Textbook Science | Abstract concepts, labels | $80-$200/year | Short-term |
| Lab Kit Science | Experiments, processes | $100-$300/year | Medium |
Most Charlotte Mason families combine outdoor observation with one other science element, such as a living book and a simple experiment kit in the upper grades. However, for elementary school, weekly outings alone are plenty.
Disadvantages and Honest Limitations
To be fair, this practice isn’t a complete science program, especially past middle school. By high school, you’ll want to add formal biology, chemistry, and physics with proper textbooks and labs. Additionally, weekly outings require parental presence, so this isn’t an “independent work” subject. And if you genuinely dislike being outdoors, your kids will pick up on it, so consider delegating outings to another family member or co-op.
Step-by-Step Instructions for Your First Outing
Here’s exactly how to run your first nature study outing from start to finish, step by step:
- Pick your location. Ideally, choose somewhere close, within 10 minutes of home, with at least a small patch of wild growth. For example, a local park, nature preserve, or even a quiet trail will work fine.
- Pack light. You only need one notebook per child, colored pencils in a zip bag, a water bottle, and a small snack. That’s it.
- Set expectations before you leave. Simply tell the kids, “We’re going to find one interesting thing today, draw it, and write one sentence about it.” Keep the bar very low.
- Walk slowly. Let the kids set the pace. If they stop to watch an ant, stop with them.
- Let each child find a subject. Each kid chooses one thing that catches their eye, a flower, a bug, a bird, a leaf. Importantly, don’t pick for them.
- Observe for five minutes. No drawing yet. Just look. Point out features together. Ask simple questions.
- Draw the subject. Find a comfortable seat. Allow each child to sketch their subject in their notebook. Never correct their art.
- Add one sentence. Write or have them dictate one observation, for instance, “A yellow butterfly sat on a purple flower.”
- Head home before boredom hits. Keep the outing under an hour your first time. Leave them wanting more.
- Look it up later. That afternoon or the next day, find the subject in a field guide together. Finally, add the name to the notebook entry.
Troubleshooting: Common Problems and Fixes
Even experienced Charlotte Mason families hit snags. Here are the most common troubleshooting scenarios and how to handle them.
- Kids say “I’m bored” within five minutes. The fix: slow down more, not less. Additionally, give them a specific task, “Find five different leaf shapes.” Boredom usually lifts within 10 minutes outside.
- A child refuses to draw. The fix: let them collect instead. For instance, they can tape or press a leaf into the notebook and dictate a sentence to you. Drawing comes later, or not, and that’s fine.
- You can’t identify anything. The fix: photograph it with your phone and look it up at home. Fortunately, many field guides are searchable by shape or color.
- Bad weather hits for three weeks straight. The fix: do 15 minutes on the porch, at a window, or under an overhang. In fact, rain nature study is memorable in its own way.
- Siblings compete instead of observing. The fix: space them 20 feet apart, each with their own “sit spot.” Essentially, this is a solo activity done alongside others.
- You feel unqualified. The fix: remember, you’re not a teacher here, you’re a fellow learner. Simply say “I don’t know, let’s find out” and mean it.
Practical Summary: Your First Month
- Week 1: First, buy notebooks and colored pencils. Then take one 30-minute walk in a local park. Finally, draw one thing.
- Week 2: Next, pick a “sit spot” in your yard or nearby park. Specifically, visit twice this week for 20 minutes each.
- Week 3: Now add a field guide. Then try to identify one bird and one tree. Afterward, record them.
- Week 4: Finally, establish a weekly rhythm. Pick your day, put it on the calendar, and don’t let anything bump it.
Frequently Asked Questions
Do I need to be a naturalist to teach this?
No, absolutely not. In fact, you learn alongside your child. For example, many parents say their own knowledge of the natural world grew more during their kids’ nature study years than during their entire public school education.
What if we live in a city?
Fortunately, city parks, community gardens, window planter boxes, and even local pigeons all count. Generally, the best nature study happens close to home, whatever that home looks like.
How often should we do it?
Once a week is the minimum that builds real skill. However, twice a week is ideal. Moreover, daily short outings (even 10 minutes) add up fast if you can manage them.
My child won’t draw. Now what?
That’s okay. Instead, let them collect and narrate. For instance, they can dictate observations while you write, or press specimens into a book. Eventually, drawing will often come on its own, unforced.
Is this enough for science credit in high school?
Not by itself, unfortunately. However, for high school, pair outdoor observation with a real biology or environmental science curriculum. Together, they make an excellent life sciences year.
Final Thoughts
This approach is the easiest Charlotte Mason practice to start, and honestly the hardest to keep going when life gets busy. However, if you can protect one weekly outing from everything else, it will become the most memorable part of your homeschool years. Our kids don’t remember their math pages. Instead, they remember the day we found a painted turtle in the creek and drew her in their notebooks. So start this week, bring the notebooks, and go look at something.
Want more? See our guides on the Charlotte Mason method, living books, narration, sample schedules, and habit training.


Leave a Reply